Bare minimum needed to host a site on a VPS
Table of contents
- Step 1: Create the VPS Instance (On DigitalOcean)
- Step 2: Register a Domain Name
- Step 3: Create an SSH Key Pair on the VPS Instance
- Step 4: Load Your Application into the VPS (From GitHub)
- Step 5: Run the Application on Some Background Task
- Step 6: Install and Configure NGINX
- Step 7: Set Up HTTPS (TLS)
- Follow Up
I was mentoring someone, and helping them get set up with hosting a simple Golang application on a VPS.
This article outlines the steps that I took.
In no way are the afforementioned steps considered to be an ideal way to deploy any applications on the Internet. This article exists merely to document what are some basic steps that I can take to deploy yet another site like it, and may serve as a segue way to at least explore automating parts or all of it.
For the purposes of this exercise, let's have the domain name be foobar.xyz.
Step 1: Create the VPS Instance (On DigitalOcean)
The VPS instance was created on DigitalOcean. A few clicks of the button, and you have a VPS provisioned for you.
I especially like to use DigitalOcean's Ubuntu Snapshots, since the basic configurations are all that's needed to proceed further.
It does not have a firewall enabled. It may not be ideal, but it is a good way to move as quickly as possible in order to deploy the application.
Additionally, I recommend creating an SSH key pair, so that you can log into the DigitalOcean box without having to enter a password. GitHub has some good documentation.
Step 2: Register a Domain Name
Any domain name registrar is fine. Almost all of them provide comprehensive set of options for the domain's DNS settings.
From Step 1, where we created the VPS, you can assign its IP address to the domain name's A record.
Once you have set the A record, you can now SSH into the machine without having to remember the machine's IP address. After all, a domain name is easier to remember than an IP address.
Step 3: Create an SSH Key Pair on the VPS Instance
The following steps were taken from GitHub's documentation.
First create the keys. The ssh-keygen utility will prompt you for a passphrase, and a filename. Don't provide a passphrase, nor do you need to provide a filename.
ssh-keygen -t rsa -b 4096 -C "your_email@example.com"
Then, add the private key to ssh-agent.
First, start the ssh-agent in the background:
eval "$(ssh-agent -s)"
Then add the key to ssh-agent.
ssh-add ~/.ssh/id_rsa
Step 4: Load Your Application into the VPS (From GitHub)
In order to load the application into the VPS, you will have to copy and paste the public key over to your GitHub repo's deploy keys list.
To get the public key, just cat the public key.
cat ~/.ssh/id_rsa.pub
Then go over to your repository's settings. It should look like the screenshot below.
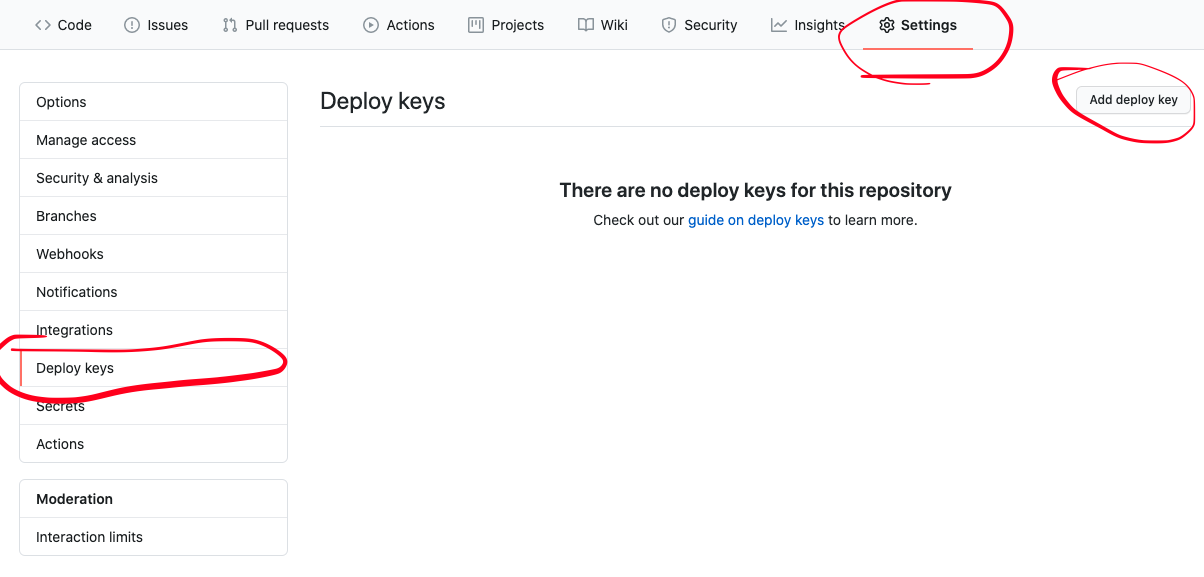
That is where to paste your VPS' public key.
Once you have your VPS' public key set up, you should be able to clone the repo.
Step 5: Run the Application on Some Background Task
For the purposes of brevity, the screen command was used.
The problem with the terminal is that if you need to exit out of it, you need to kill all processes that were spawned by bash or shell (or any like it).
screen allows you to have your tasks run, even after you have left your main shell that you logged into via ssh.
To spawn up a screen instance, just invoke the following command:
screen -S myname
(replace myname with anything you want).
Then, you should see a new shell instance open up. That is your new screen!
In it, spawn up your application.
Note: running your application this way typically doesn't provide any mechanism to restart when application closes, or when the system restarts. You have to manually ensure uptime.
Then, to exit out of the screen, Press the "Ctrl + A" and "Ctrl + D" combination.
Step 6: Install and Configure NGINX
NGINX will serve as the proxy. Its primary purpose will be to forward HTTP requests over to your application.
It will especially be useful for setting up TLS (HTTPS).
Without NGINX, it will be your application that handles getting the certificates, TLS handshape, encryption, TCP-level message authentication, etc.
So instead of all that, we can have NGINX handle it all.
But before, we will first need to set up NGINX.
First, install NGINX
apt updateapt install nginx
Then, in the /etc/nginx/sites-available folder, create a new file named foobar.xyz (the domain name).
Let's also assume that your application is listening on port 3030.
In it, the content would look like this:
map $http_upgrade $connection_upgrade {default upgrade;'' close;}server {# IMPORTANT: change the domain name here.server_name foobar.xyzlisten 80;location / {# IMPORTANT: change the port number from 3030, to whatever your# application is listening toproxy_pass http://127.0.0.1:3030;proxy_http_version 1.1;proxy_set_header Upgrade $http_upgrade;proxy_set_header Connection $connection_upgrade;proxy_set_header Host $host;}}
Save the file, and create a symbolic link for it in sites-enabled.
ln -s /etc/nginx/sites-available/foobar.xyz /etc/nginx/sites-enabled/foobar.xyz
Then, delete the default symbolic link in /etc/nginx/sites-enabled.
cd /etc/nginx/sites-enabledrm default
Finally, restart the NGINX instance.
systemctl restart nginx
The above tutorial was adapted from DigitalOcean's NGINX tutorial
Step 7: Set Up HTTPS (TLS)
Finally, you want your site to be secure. And to do that, you would set up TLS certificates.
First install the utilities.
apt install certbot python3-certbot-nginx
Then, invoke the following command.
certbot --nginx -d foobar.xyz
And your site should be ready.
The above tutorial was adapted from DigitalOcean's Certbot Tutorial
Follow Up
The above tutorial is rather lacking, for several reasons. Here are a few that I can think of:
- the application doesn't respawn if it were to crash, or if the VPS were to restart
- firewall is not enabled
- the entire application is hosted on a single point of failure
- a lot of marketers prefer that domain names are prefixed with
www, and so having the site sit befindfoobar.xyzinstead ofwww.foobar.xyzis not ideal - lack of CI/CD
Nevertheless, it's a good start.
Some readings
- How to use systemd to have your apps running in the background forever
- Beginner's guide to NGINX
- VIM Adventures This is a game to teach you to use VIM. VIM is a command-line text editor, like nano, but is highly powerful, and I recommend using this instead of nano